


Feedback
Set up your developer environment
These steps describe how to set up your environment for developing with RelativityOne.
Step 1 - Install the Relativity Visual Studio templates
Use these steps to install the Relativity templates through Visual Studio:
Relativity templates are only supported in VS2017 or VS2019.
- Open Visual Studio 2017 or 2019.
-
Click Extensions > Manage Extensions in the menu bar.

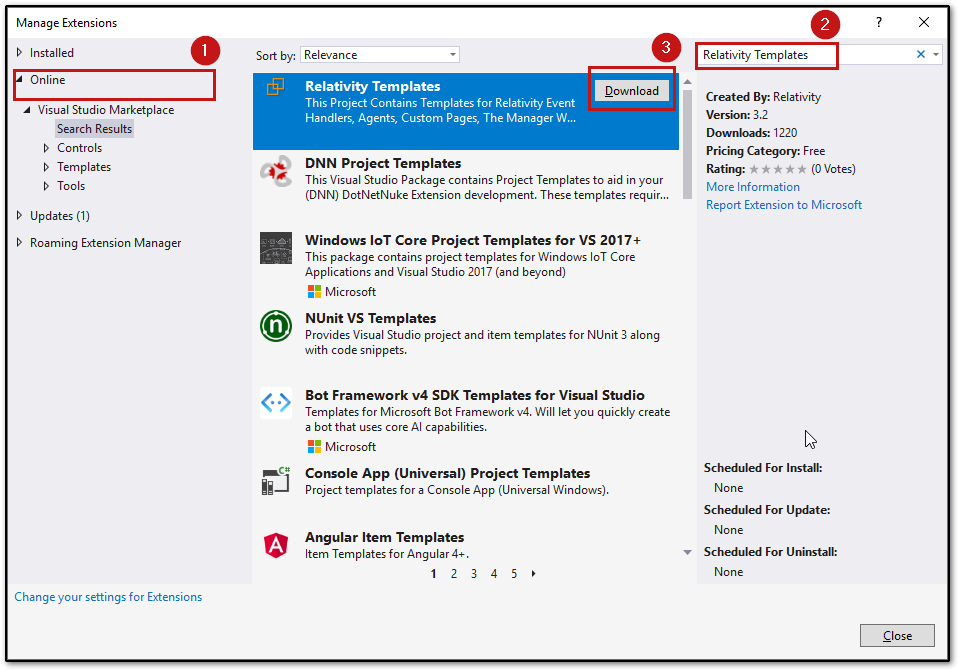
- In the Manage Extensions dialog, complete these steps:
- Click Online in the left pane, if it isn't selected.
- Enter Relativity Templates in the search bar on the right pane.
- Click Download on the matching extension.
- Close Visual Studio. The VSIX installer automatically opens.
- Complete the steps in the VSIX installer to install the templates.
Step 2 - Set up Relativity Community and DevHelp accounts
Begin your Relativity development experience by setting up the following accounts:
- Relativity Developer Community - set up a Community account to interact with the Relativity Developer community.
- Relativity DevHelp Community - set up an account to ask questions, obtain suggestions from other Relativity Developers, and stay updated about Relativity news.
Use the following steps to create your accounts:
- Create a Relativity Developer Community account by completing these steps:
- Fill out the Relativity Developer Community account form.
- Click the password change link and set your password.
- Log in to the Relativity Community portal.
- Click Groups in the navigation bar to join the Relativity Developer Group.
- Click Relativity Developer Group.
- Click + Join Group to be added to the group.
- Create a Relativity DevHelp Community account by completing these steps:
- Go to the Relativity DevHelp Community page.
- Click Sign Up to create a new account.
- Complete the create account form.
Be sure to enter the same email address in form as you used when creating your Relativity Developer Community account.