


Feedback
Publish and upload custom pages
To make your custom pages available to users, you need to publish the page to a specified location. Next, you associate your custom page with a Relativity application.
Publish your custom page project
You need to publish your Visual Studio project that contains your custom page before you can upload the files to Relativity.
- Open your custom page project in Visual Studio.
- In Solution Explorer, right-click on your project and click Publish.

- In the drop-down box, select New and enter a name in the New Profile box. Click OK.

- Select a Publish Method.
- Click
 to choose a location for your published files.
- Click Next and select Debug from the Configuration drop-down box.
- Click Publish.
- Navigate to the directory where you want to publish your web application.
- Add the contents of the parent directory to a .zip file. (Don't add the parent directory to this file.)

- Complete the steps in Upload a custom page file to Relativity.
Upload a custom page file to Relativity
Use the following steps to add a custom page to a Relativity application:
In Relativity,
- Select the Custom Pages tab, located at the instance level.
- Click New Custom Page to display the Custom Page Layout. See Custom page layout fields.
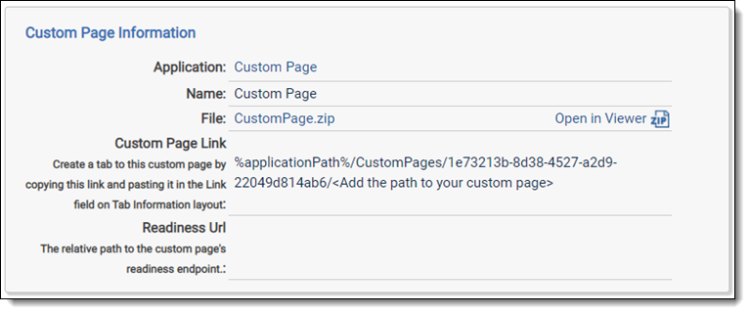
- Click Save to view custom page properties. Relativity updates the Custom Page Link field so that it now displays a base URL. You can use this URL when creating tabs. For more information, see Custom page layout fields.
When you click Save, Relativity verifies that you haven't selected a restricted file type. An error appears if you select a restricted file type, or if you attempt to modify a custom page that is part of a locked application.
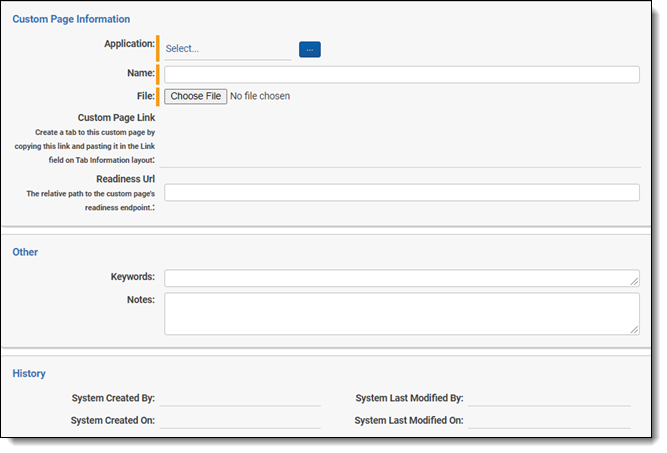
Custom page layout fields
The custom page layout contains the following fields:
- Application - the name of the application associated with the custom page.
- The application details view in a workspace no longer lists a "Custom Page" section.
- Name - the name of the custom page.
- File - click
 to select the file containing the source code for your custom page. You must publish your custom page before you can select it here. See Publish your custom page project. Optionally, click
  to remove the selected file from the field.
 - Custom Page Link - this field displays a base URL that you can use to link your custom page to a tab after you click Save. When you create a tab, you can copy this URL, and add a folder name or page name to the end of it. Relativity displays this page for users, when they click the tab associated with the path to the custom page that you implemented. For more information, see Use external tabs as links to custom pages.
If you add a folder name to the path, verify that folder contains the default page that you want displayed for users in the Relativity UI.
- Readiness Url - this field contains the relativity path to the custom page's readiness endpoint. For more information on this field, see Basic concepts for custom pages.