Build your first Relativity application in the UI
This tutorial familiarizes you with functionality in the Relativity UI that supports packaging multiple components in a custom application. It illustrates how to create a simple Relativity application that includes two Relativity Dynamic Objects (RDOs). These RDOs share a many-to-many relationship between them. It also shows you how to export the application as a RAP file that you can use to install the application in another workspace.
Before you begin
Complete the following tasks depending on your development goals:
- Obtain access to an instance of Relativity used for development purposes. In Relativity, obtain the appropriate system admin permissions to install an application. For more information, see Security and permissions on the Relativity Documentation site.
- Familiarize yourself with the Relativity UI. If you want to enhance your basic application, you can create components through the Relativity UI and add them to your application.You can find additional information about the following components on the Relativity Documentation site:
- Learn about adding custom code to your application. See these tutorials for information about adding agents, event handlers, and custom pages to your applications:
- Note that Custom Applications in the Repository workspace are prohibited
Build a Relativity application in the UI
- Open the Relativity instance used for development.
- Create a new workspace. You can also use an existing workspace to deploy your application. For more information, see Workspaces on the Relativity Documentation site.
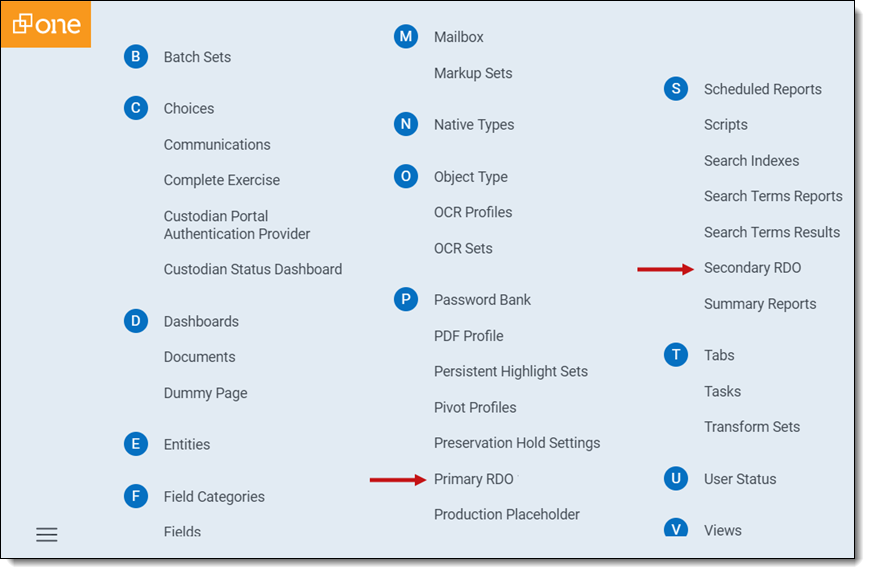
- Search for the Relativity Applications tab at the workspace level.
- Click New Relativity Application.
(Click to expand)

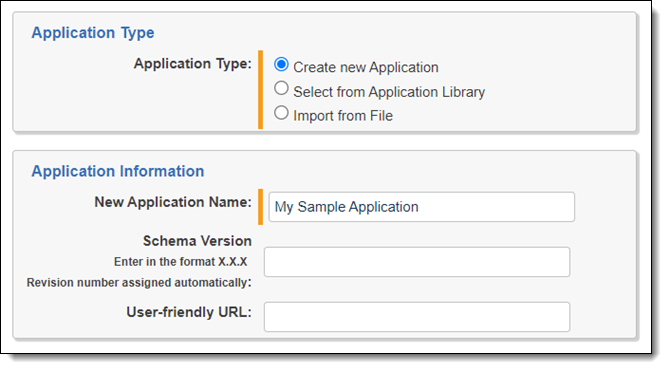
- In Application Type field, click Create new Application.
- In New Application Name field, enter My Sample Application.
- Click Save to display the details view of the application. After creating an application, you can add new Object Types and their related schema objects, such as views, layouts, and tabs.
(Click to expand)

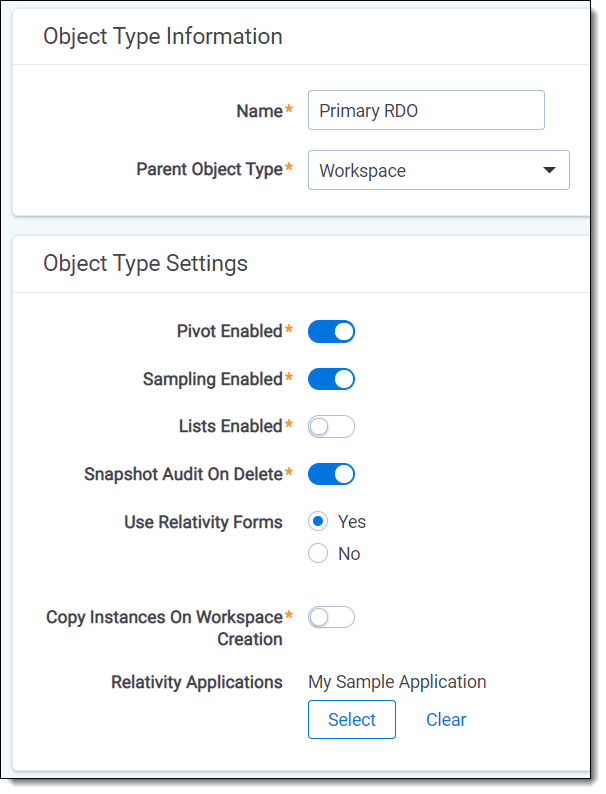
- In the Object Type associative list, click New.
(Click to expand)

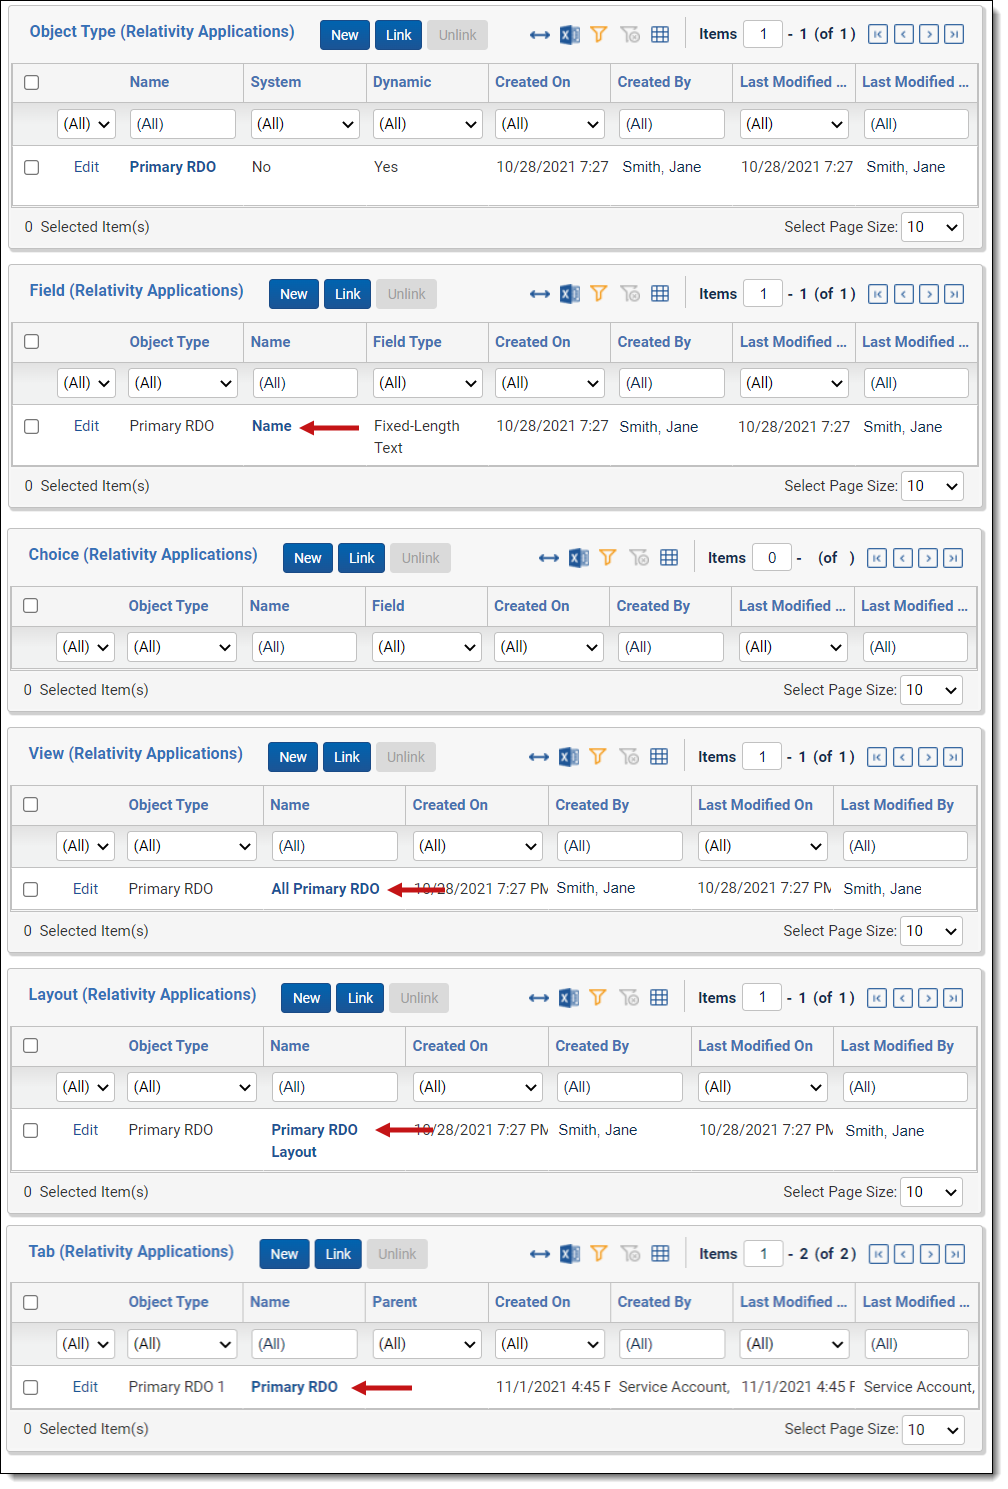
- In the Name field, enter Primary RDO, and click Save and Back. In addition to the Primary RDO object type, the details view displays the following components:
- Name field
- All Primary RDOs view
- Primary RDO Layout
- Primary RDO Tab
(Click to expand)

- Repeat steps 7 and 8 to add another RDO called Secondary RDO. You should see both the Primary RDO and Secondary RDO listed under the Object Type associative list.
- To create a relationship between the Primary and Secondary RDOs, click New on the Field associative list.
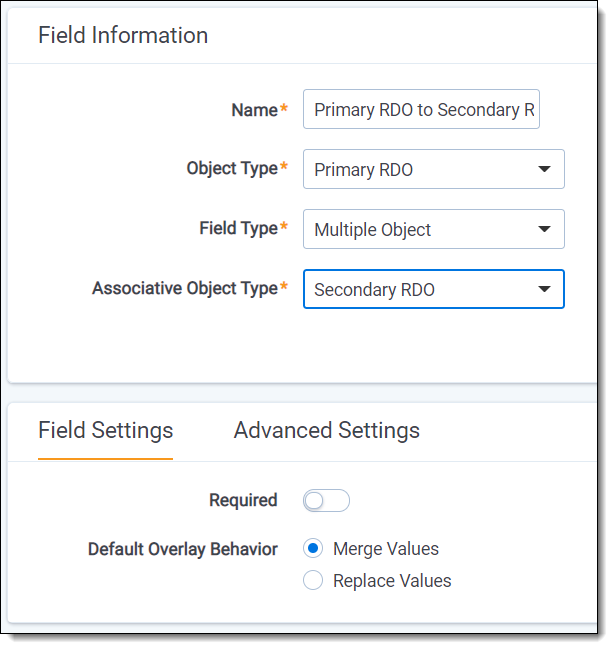
- Enter or select the following information for the field:
- In the Name field, enter Primary RDO to Secondary RDO.
- In the Object Type field, select Primary RDO.
- In the Field Type, select Multiple Object. Relativity now displays the Associate Object Type field.
- In the Associate Object Type field, select Secondary RDO.
- Click Save and Back to display the application details view.
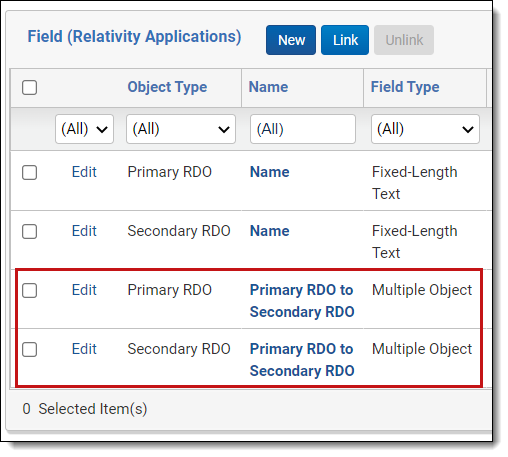
- Click Link on the Field associative list to display the Select Items dialog.
- Select Primary RDO to Secondary RDO for the Primary RDO and Secondary RDO object types. The Field associative list now includes two new objects with a many-to-many relationship between the Primary and Secondary RDOs. You can export your simple application from this workspace for installation in other workspaces.
- To create an application file, click Export Application in the console.
- Click Export in the conformation message.
- Use the browser prompts to select the location where you want to save your application file. You can use this file to install or import your application to another workspace.
- Create a new workspace where you want to install your application. For more information, see Workspaces on the Relativity Documentation site.
- Click the Relativity Applications tab.
- Click New Relativity Application.
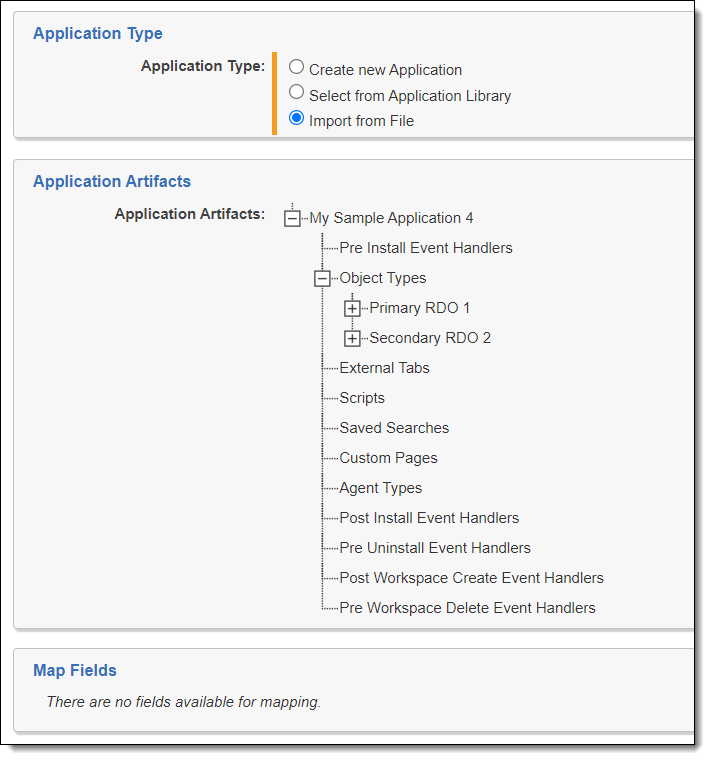
- In Application Type field, click Import from File.
- In File field, click Browse and select your new application file. After you select the file, Relativity displays the metadata for the application that you want to import.
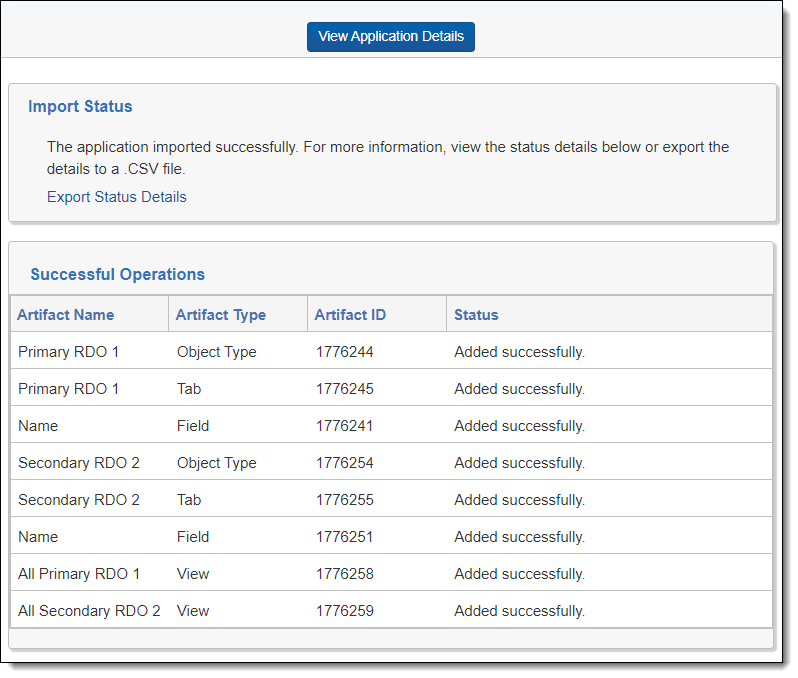
- Click Import. Relativity imports the application and displays the components that it successfully updated or created.
- Click View Application Details. The details view includes all the application components that were exported from the previous workspace. In addition, Relativity added a new tabs for the Primary and Secondary RDOs imported to the workspace.

(Click to expand)
(Click to expand)
(Click to expand)
(Click to expand)
(Click to expand)