Visual Studio templates
You can streamline your application development and follow best practices by using Relativity templates for Visual Studio 2017 or 2019. Available templates include agents, custom pages, event handler types, and Integration Points. They contain required attributes, inherit from base classes as necessary, and include any methods that you need to override.
In addition, they include library references to the .dll files that are required to build a specific Relativity component. You must install the Relativity SDK to update the references in the template. Next, you simply modify the text in any placeholders that the template includes and then add your custom code to the file.
The templates are also available in the relativitydev GitHub repository as an open source project: https://github.com/relativitydev/relativity-templates.
This page contains the following information:
- Available Relativity templates
- Install the Relativity templates
- Use the Relativity project templates
- Use the Relativity item templates
- Relativity Manager-Worker Agent template
Available Relativity templates
The following templates appear under the Visual C# > Relativity subcategory after you install them in Visual Studio. See Use the Relativity project templates and Use the Relativity item templates.
| Project or item template | Use this template for developing... |
|---|---|
| Agent | Background processes that don't interfere with user activities performed through the Relativity UI. For conceptual information, see Agent. |
| Console event handler | An event handler that executes when the user navigates to the view page of an object. For conceptual information, see Console event handler. |
| Custom page form | Custom pages using ASP.NET Web Forms. For conceptual information, see Custom page form. |
| Custom page MVC 5 | Custom pages using ASP.NET MVC 5. For conceptual information, see Custom page MVC 5. |
| Kepler service | A custom service for REST exposed through a .NET interface. For conceptual information, see Kepler service. |
| Page Interaction event handler | An event handler that you can use to inject JavaScript code or load your own Cascading Style Sheets (CSS) file on the view or edit page of an object. For conceptual information, see Page Interaction event handler. |
| Post Install event handler | An event handler that executes immediately after the user installs an application. For conceptual information, see Post Install event handler. |
| Post Save event handler | An event handler that executes after the property values on an object are written to the database. For conceptual information, see Post Save event handler. |
| Pre Cascade Delete event handler | An event handler that executes when a user attempts to delete an object, which has dependent objects. For conceptual information, see Pre Cascade Delete event handler. |
| Pre Delete event handler | An event handler that executes after a user clicks the Delete button or performs a Mass Delete in Relativity UI. For conceptual information, see Pre Delete event handler. |
| Pre Install event handler | An event handler that executes during the installation of an application. For conceptual information, see Pre Install event handler. |
| Pre Load event handler | An event handler that executes before Relativity loads a New, Edit, or View page. For conceptual information, see Pre Load event handler. |
| Pre Mass Delete event handler | An event handler that performs a one-time operation on a group of objects before Relativity deletes those objects. For conceptual information, see Pre Mass Delete event handler. |
| Pre Save event handler | An event handler that executes when the user clicks the Save or Save & Next button on a Relativity layout after changing a value for at least one field. For conceptual information, see Pre Save event handler. |
| Pre Uninstall event handler | An event handler that executes cleanup tasks associated with removing an application from workspaces or from your Relativity environment. For conceptual information, see Pre Uninstall event handler. |
| Manager-Worker Agent template | A manager - worker agent solution. It includes manager and worker agents, custom pages for managing the queues, and a post-install event handler. For conceptual information, see Manager-Worker Agent template. |
Install the Relativity templates
You can obtain Relativity templates by downloading them from the Visual Studio Marketplace or adding them as extensions through Visual Studio. Before you install the Relativity templates, install the Relativity SDK and Visual Studio 2017 or 2019 on your machine. For more information, see Set up your development environment.
Note: Use of the Relativity templates isn't supported in Visual Studio Express.
Download templates from Visual Studio Marketplace
Use these steps to download and install Relativity templates:
- Open the Relativity Templates page in the Microsoft Visual Studio Marketplace portal.
- Click Download to save the templates to your local machine.
Note: If you have an older version of the Relativity templates installed, uninstall them.
- Close Visual Studio. You need to restart Visual Studio to populate the templates if it was open when you installed them.
- Double-click the Relativity Templates.vsix file.
- In the VSIX Installer dialog, click Install.
Add templates through Visual Studio
Use these steps to install the Relativity templates through Visual Studio:
- Open Visual Studio.
- In the Tools menu, click Extensions and Updates.
Note: If you have an older version of the Relativity templates installed, uninstall them.
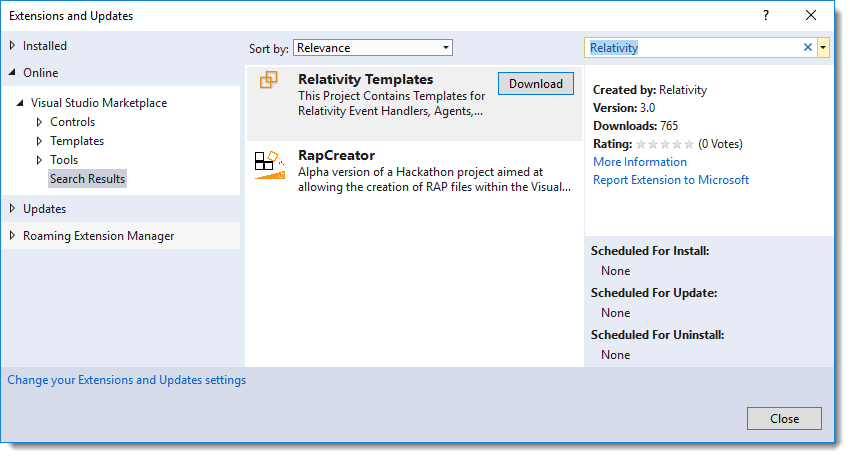
- On the Extensions and Updates dialog, expand Online, and select Visual Studio Marketplace.
- Search for Relativity.
(Click to expand)

- Click Download, and then click Install on the Software License dialog.
- Close Visual Studio, and then reopen it to make the templates available.
Use the Relativity project templates
You can use project templates when you want to create a new solution. To avoid errors, ensure that you installed the Relativity SDK correctly.
Use these steps to develop with a project template:
- Open Visual Studio.
- In the File menu, click New Project.
- In the New Project dialog, expand Visual C# Items, and then Relativity.
- Select a template for an agent, custom page, or event handler. See Available Relativity templates.
- Enter the solution name and other information.
- Click OK.
Use the Relativity item templates
You can use the item templates when you want to add an agent, custom page, or event handler to an existing solution. Ensure that you add the required references to the project to avoid error messages. Visual Studio displays an error indicating that you are missing assemblies. For more information, see Set up your development environment.
Use these steps to add item templates:
- In Visual Studio, open your solution.
- In the Solution Explorer, right-click on a solution to display a menu.
- Click Add > New Item.
- In the Add New Item dialog, select Visual C# Items > Relativity.
- Select a template for an agent, custom page, or event handler. See Available Relativity templates.
- Enter the solution name and other information.
Note: Add the references to the libraries for the type of item that you are adding to your project, such as kCura.EventHandler.dll and Relativity.API.dll. Otherwise, Visual Studio displays an error message when you build the project. For more information, see Set up your development environment.
- Click OK.
Relativity Manager-Worker Agent template
The Manager-Worker Agent project template demonstrates an architectural pattern where a long-running agent task can be split into single or multiple manager/worker agents that execute the task in parallel. This template also contains the recommended best practices for coding and features like resource-pool aware agents, configure agents to run in off hours, a custom page to view manager/worker agents progress, unit tests projects etc.
The template creates a solution with the following projects:
Agents
This project includes a manager agent and a worker agent. Single or Multiple Manager/Worker agents can be installed in the environment. The only thing you should change is the ProcessRecordsAsync method of the Job class. This is where all of the agent work should happen.
Agents.NUnit
Add any unit tests for the agent project to this project.
CustomPages
This project includes custom pages to manage both the worker and the manager queue. Once you create an application which includes the custom pages, you can create a tab to view each queue using the following URLs:
%ApplicationPath%/CustomPages/<AppGuid>/ManagerAgent/Index/?StandardsCompliance=true&%AppID%
%ApplicationPath%/CustomPages/<AppGuid>/WorkerAgent/Index/?StandardsCompliance=true&%AppID%
CustomPages.NUnit
Add any unit tests for the custom pages to this project.
EventHandlers
This project includes a post-install event handler to create the underlying queue tables and error log table. It also includes a console event handler which can be used to manage jobs in the manager queue using a custom object if you do not wish to use the custom pages to manage the jobs.
EventHandlers.NUnit
Add any unit tests for the event handlers to this project.
Helpers
This project includes the shared code between the projects in the solution. The only thing you should change are these three constants in the Constant class:
- ApplicationGuid - the GUID of the application.
- ManagerQueueTab - the GUID of the tab which displays the manager queue custom page.
- WorkerQueueTab - the GUID of the tab which displays the worker queue custom page.
Helpers.NUnit
Add any unit tests for the helpers project to this project.
