


Feedback
Create an application in Relativity
A Relativity application consists of objects used alone or in conjunction with each other to store and manage information other than document metadata. You can add these customizable and securable objects to workspaces as you build an application. Using the Application Deployment System (ADS), you can package components added to your custom application. You can now easily deploy it to other workspaces or Relativity instances.
In the Relativity UI, you can create Relativity Dynamic Objects (RDOs), views, layouts, choices, tabs, and fields for inclusion in your application. You can also provide advanced functionality in your application by uploading custom code for event handlers, mass operations, and other features to Relativity. After you complete these steps, you can create an application, and then add these components and your custom code to it.
You can build different types of applications using the ADS. For example, you could build an application to structure evidence for a review. You could also build an application to manage a business workflow. It might reside in a workspace created specifically for system admins, so that they can manage their daily administrative tasks.
Create an application
You can create Relativity applications to perform specialized functions in a workspace. After you create an application, you can customize it by adding new objects to your application or linking to existing ones. See Add components to an application.
To create an application, you need the following permissions:
- Add rights to the Relativity Application object on the Object security tab.
- View rights to the Relativity Applications tab in the Tab visibility list.
For more information, see Workspace security on the Relativity Documentation site.
Use these steps to create an application:
- Open a workspace where you want to create the application.
- Click the Relativity Applications tab.
- Click New Relativity Application to display New Application layout. See New application layout fields.
- Click Save to display the application details view. You can add custom components to your application and perform other tasks from this view. See View or edit application details.
New application layout fields
The new application layout contains the following fields:

- Application Type – click one of the following options:
- Create new Application – creates a new application without any components in your workspace. You can then add new components to it as necessary. See Add components to an application.
- Select from Application Library – installs an application from the Application Library in your workspace. See Installing applications on the Relativity Documentation site.
- Import from File – installs a RAP application in your workspace. See Installing applications on the Relativity Documentation site.
- New Application Name – the name that you want assigned to the application.
- (Optional) Version – the version number for the application. Use the format X.X.X (Major.Minor.Build), exemplified as 1.0.0.
If you don't enter a version number, Relativity automatically assigns one to the application when you export it. See Application schema versions.
- Tab Display – select Vertical or Horizontal to control how child tabs appear under the parent tab.
- (Optional) User-friendly URL – enter a value that you want displayed in custom page URLs. Relativity displays this value instead of the application GUID and other complex path information.
View or edit application details
To view application details, click the name of an application on the Relativity Applications tab. These details also appear immediately after you create a new application. You can use the buttons at the top of the page to edit, delete, or perform other tasks with the application.

- Application Information and History sections – The Application Information section displays the name, version, and orientation of the tab for the application. The History section displays information about the user who created and last modified the application, and the associated dates.
- Relativity Application console – The console includes buttons and links for performing tasks used in administering and developing custom applications.
- Associative lists – You can use the associative lists on the details view to add custom components to your application, such as fields, choices, event handlers, and others. See Add components to an application.
Add components to an application
You can customize your application by adding new components to it or by modifying its existing components. Before you start adding or modifying components, review these guidelines:
- Pushing application to Application Library – You may want to add your application to the Application Library so that you can associate files uploaded through the Resources file tab with it. See View or edit application details.
- Uploading files – You need to upload the compiled assemblies for event handlers, agents, and mass operation handlers as resource files before you can add them as application components. See Resource files on the Relativity Documentation site.
- Unlocking or locking applications – You need to unlock the application before adding or removing any components. As a best practice, lock the application when you finish your updates to ensure that it isn't inadvertently modified. For more information, see Locking and unlocking applications on the Relativity Documentation site.
Use these steps to add components to an application:
- Locate the associative list for the component that you want to add or modify on the details view of the application. For example, the Object Type list appears in this screen shot.
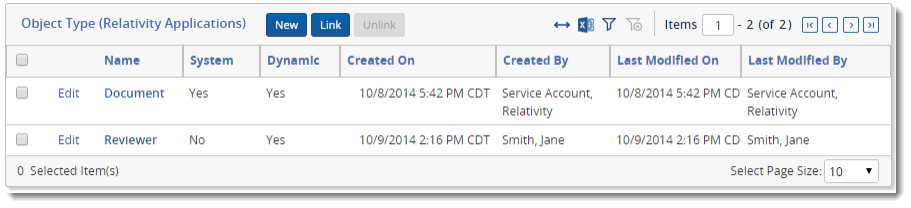
- Perform one or more of these tasks depending on the component type:
- Create a new object – Click New to display the form for the object that you want to create. Relativity automatically links this object to your application. From the application details view, you can create object types, fields, choices, views, layouts, tabs, Relativity scripts, and application event handlers.
- Add an existing object – Click Link to displays the Select Items dialog. If an object is already linked to your application, it isn't listed on this dialog. This option is available for all components except application event handlers. To add event handlers, click New.
- Dissociate an object from the application – Select the checkbox for an object and click Unlink. When you unlink an object, Relativity dissociates it from the application, but doesn't delete it from your environment. To remove application event handlers from an application, click Delete. This operation also deletes these event handlers from your environment.
- Modify properties of an object – Click the Edit link for an object.
- To ensure that you can export your application, review the requirements for valid components. See Validation requirements for application components.
Associative lists
Use the following associative lists to add custom functionality to your application:
- Object Type – See Creating and editing Relativity Objects.
- Field – See Fields on the Relativity Documentation site.
- Choice – See Choices on the Relativity Documentation site.
- View – See Views on the Relativity Documentation site.
- Layout – See Layouts on the Relativity Documentation site.
- Tab – See Tabs on the Relativity Documentation site.
- Event Handler – You can add object type event handlers from this associative list. These event handler types include Console, Page Interaction, Pre Cascade Delete, Pre Delete, Pre Load, Pre Mass Delete, Pre Save, and Post Save event handlers. For more information, see Add object type event handlers.
- Object Rule – You can link objects rules defined for specific objects to your application. See Creating and editing Relativity Objects.
- Relativity Script – You can link custom SQL and other scripts to your application. See Develop scripts.
- Custom Page – You can create a new custom page or associate an existing one with an application. See Publish and upload custom pages.
- Application Event Handler – You can associate Pre Install or Post Install event handlers with an application. These event handlers are run prior to or after the installation of an application respectively.
- Mass Operations – You can associate mass operations with an application.
- Saved Search – You can link a saved search to an application. When you create or edit a saved search, you can optionally select an application to associate with it. For more information, see
- Dashboard – You can link a dashboard to an application. If the dashboard has other associations, such as to specific objects or fields, you must also include them in your application. See Dashboards on the Relativity Documentation site.
Validation requirements for application components
You can export only Relativity applications that contain valid and exportable components, such as fields, scripts, layouts, views, object types, object rules, choices, event handlers, and tabs. When an application contains invalid components, you can't export it. The following table lists the requirements for valid application components. You can use them to determine that the application is exportable, and to troubleshoot application errors. See View application errors.
You can always export agent types, custom pages, and Relativity scripts.